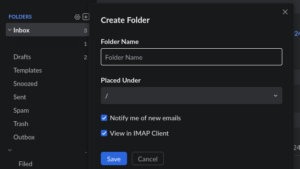
Zoho, as do all modern email services have filters and folders to organize your inbox and setting these up can help alleviate headaches, nausea and other side effects of having a large influx of emails. To set up a folder look for the “FOLDERS” button highlighted in blue and seen in the screenshot below, there’ll be a plus button and clicking this will allow you to create a folder. Name it based on the types of emails you intend to be sent, for example “Newsletters” and then save.

If you don’t want to be notified of new emails entering that inbox, that’s fine, just untick the “Notify me of new emails” button.
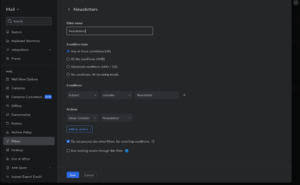
Now you can drag emails from your inbox into this folder and they’ll appear in that folder. To set up an automatic filter you’ll want to click on the gear button and it’ll bring up a settings menu. Find the filters tab and then click the “New filter” button highlighted in blue, choose a filter name such as “Newsletters”. Under conditions it’ll be automatically set to “From” but you can change this to a number of different conditions, in our case we’ll change it to “Subject” and then a textbox will have changed to “Enter value”. The value here can be anything you want to be filtered, it’ll look at the Subject line of incoming emails and then filter based on keywords, so if it has “Newsletter” in the Subject Line all emails containing that will be sent to the “Newsletters” folder. Under actions it’ll say “Move to” followed by “Select folder”. Click on Select folder and then the folder you created, in our case “Newsletter” then click the blue save button.

Play around with the different filter conditions but keep in mind some can overlap, so only really set them up with the values you consider crucial.
